Table of Contents
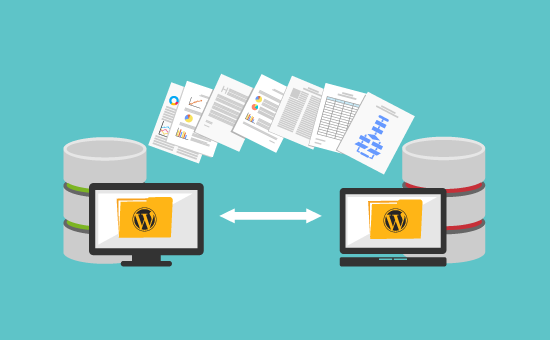
Migrate your website to WordPress involves moving your existing content, design, and functionality to a WordPress platform. This process can vary depending on your current website platform (e.g., static HTML site, another CMS like Joomla or Drupal, etc.). Here’s a step-by-step guide to help you migrate your website to WordPress:
Steps to Migrate your website to WordPress
Step 1: Prepare for Migration
- Backup Your Existing Website:
- Before you begin the migration process, make sure to create a full backup of your current website. This includes all files, databases, and any other important data.
- Choose a WordPress Hosting Provider:
- If you haven’t already, choose a hosting provider that supports WordPress. Many providers offer specialized WordPress hosting plans that come with WordPress pre-installed.
- Install WordPress:
- Install WordPress on your new hosting account. Many hosting providers offer one-click installation, but you can also install WordPress manually if needed.
Step 2: Set Up WordPress
- Choose a Theme:
- Select a WordPress theme that closely matches the design of your current website or suits your new design requirements. You can find free and premium themes in the WordPress theme directory or from third-party providers.
- Install Essential Plugins:
- Install any plugins that will help you replicate the functionality of your current website. Some essential plugins include:
- SEO Plugins: For optimizing your site for search engines.
- Backup Plugins: For regular backups of your WordPress site.
- Security Plugins: To enhance the security of your site.
- Contact Form Plugins: If your current site has contact forms.
- Install any plugins that will help you replicate the functionality of your current website. Some essential plugins include:
Step 3: Migrate Content
- Export Content from Your Current Site:
- Depending on your current platform, export your content. For example:
- HTML Site: Manually copy content from your HTML files.
- CMS (e.g., Joomla, Drupal): Use the built-in export tools or plugins available for exporting content.
- Depending on your current platform, export your content. For example:
- Import Content to WordPress:
- Use the WordPress Importer tool to import your content. Go to Tools > Import in the WordPress dashboard and choose the appropriate importer for your content format (e.g., XML file, RSS feed, etc.).
- Manually Transfer Pages and Posts:
- If your content is not easily exportable, manually recreate pages and posts in WordPress. Copy and paste the text, and upload images and other media files.
- Check and Fix Formatting Issues:
- After importing, review your content to ensure formatting is correct. You may need to adjust headings, links, and other elements to match your original design.
Step 4: Migrate Design and Functionality
- Replicate the Design:
- Customize your chosen WordPress theme to match the look and feel of your original website. You may need to tweak the CSS, use page builder plugins, or even hire a developer for more complex designs.
- Recreate Navigation Menus:
- Set up your WordPress navigation menus to match your existing website structure. Go to Appearance > Menus to create and arrange your menus.
- Add Widgets and Sidebars:
- If your original website had widgets or sidebars, add similar widgets in WordPress. Go to Appearance > Widgets to configure them.
- Migrate Forms and Other Features:
- If your website had forms (e.g., contact forms, subscription forms), recreate them using WordPress plugins like Contact Form 7 or WPForms.
Step 5: Test Your New WordPress Site
- Check All Pages:
- Visit each page on your new WordPress site to ensure everything looks and functions as expected. Check for broken links, missing images, and other issues.
- Test Functionality:
- Test forms, search functionality, and any other interactive elements to ensure they work correctly.
- Cross-Browser Testing:
- Ensure your site looks good on all major browsers (Chrome, Firefox, Safari, Edge) and is responsive on mobile devices.
Step 6: Redirect Old URLs
- Set Up 301 Redirects:
- If your old website had different URLs, set up 301 redirects to direct users and search engines to the corresponding pages on your new WordPress site. This is crucial for maintaining SEO rankings.
- Update Internal Links:
- Check and update internal links to ensure they point to the correct pages within your WordPress site.
Step 7: Go Live
- Change DNS Settings:
- Update your domain’s DNS settings to point to your new WordPress hosting provider. This will make your new WordPress site live.
- Monitor for Issues:
- After going live, monitor your site for any issues, such as broken links, missing content, or performance problems. Address any issues as they arise.
- Submit Sitemap to Search Engines:
- Submit your new sitemap to search engines like Google to ensure your new site is properly indexed.
Step 8: Post-Migration Tasks
- Install Analytics:
- Set up Google Analytics or another tracking tool to monitor your site’s traffic and performance.
- Optimize for Speed:
- Use caching plugins, optimize images, and take other steps to improve your site’s loading speed.
- Regular Backups:
- Schedule regular backups of your WordPress site to protect against data loss.
Conclusion
Migrate your website to WordPress can be a complex process, but by following these steps, you can ensure a smooth transition. WordPress offers powerful features and flexibility, making it a great choice for most websites. After the migration, you’ll benefit from WordPress’s user-friendly interface, extensive plugin ecosystem, and strong community support.