
Table of Contents
Why Should I Add Signatures in Roundcube?
Email signatures help you share your contact information with people you correspond with digitally so they know how to reach you. However, an email signature can also do so much more than just share your name, address, and phone number with people. In fact, it can give them an insight into who you are and what you look like.
Unlike most other email clients, you have a lot of control over formatting and images when you add a signature in Roundcube. In fact, Roundcube supports full HTML, giving you endless options in terms of design.
Get Rid of Inbox Mess
Clear out the clutter in your Roundcube mailbox with the help of Clean EmailTry it NOW
How to Create a Signature In Roundcube Webmail
Most people want their email signatures to look professional and crisp. However, most email clients do not give you a lot of tools to create and format your email signature, and Roundcube is no different. Therefore, the easiest way to do this is by either formatting your signature elsewhere and pasting it into the signature box.
Many people aren’t sure how to set up a signature in Roundcube webmail. Luckily, Roundcube Webmail gives you the option to paste HTML coding or preformatted text. In other words, you can use one of the three following methods for how setting up a signature in Roundcube webmail.
Option 1: Make Your Own Roundcube HTML Signature
Since Roundcube fully supports HTML formatting, you can make your own Roundcube HTML signature. This would simply require you to type up all of the source code, which you can do in a program like Notepad (Windows) or TextEdit (Mac).
However, unless you are an HTML wiz, this method is very time-consuming and frustrating. Furthermore, it can be hard to code things like images, logos, and hyperlinks. If that doesn’t sound fun to you, then we recommend you look at the other two options.
Option 2: Make a Roundcube Email Signature With an Email Signature Generator
If you like the idea of a Roundcube html signature but don’t know enough about the language to create your own, that’s okay. You can simply use an email signature generator to create a fully customized design and then add the signature in Roundcube.
A simple web search will provide you with dozens of free options to create a custom HTML design. However, some great options for email signature generators include WiseStamp, Newoldstamp, and LetsSignIt.
Many of these generators provide you with Roundcube signature templates you can simply create, then copy and paste into your Webmail signature box.
If you use this method, just make sure you can get the source code and use the code tool when you go to paste it into Webmail.
Step-by-Step Guide to Adding an Email Signature in Roundcube
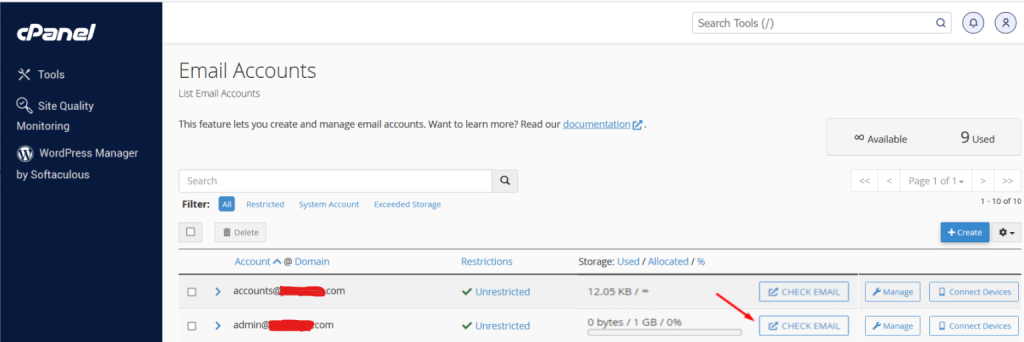
Step 1: Log into Roundcube
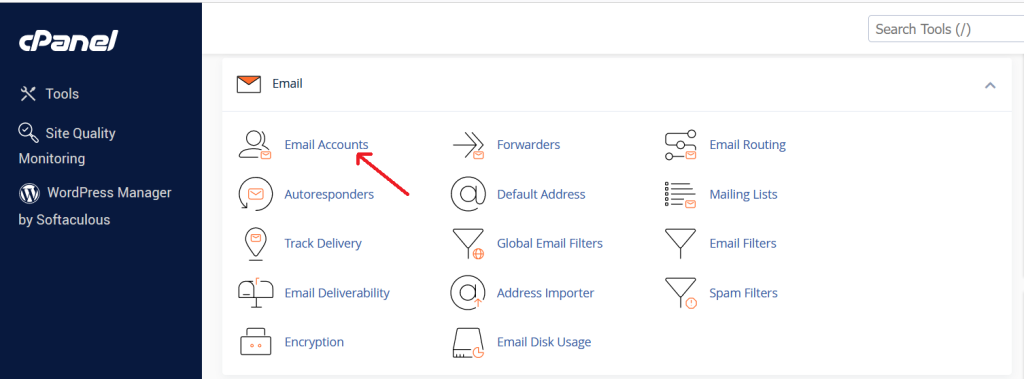
- Open your web browser and navigate to the URL where your Round cube webmail is hosted. This URL is typically provided by your email service provider or web hosting company.
- Enter your email address and password to log in.
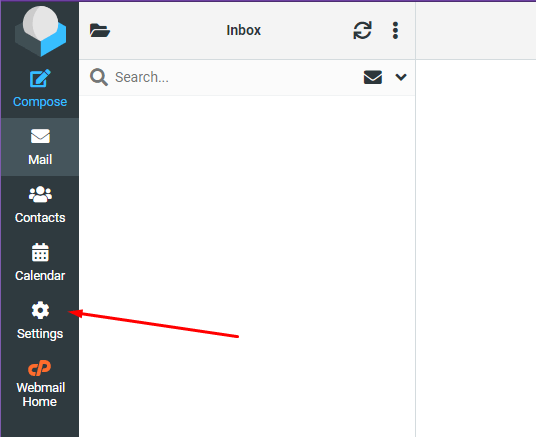
Step 2: Access the Settings
- Once logged into Roundcube, look for the “Settings” option. This is usually located in the top right corner of the interface.
- Click on “Settings” to open the settings menu.
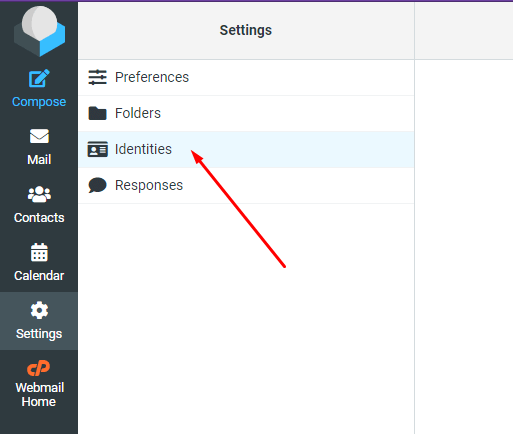
Step 3: Navigate to Identities
- In the settings menu, you will see several options. Click on “Identities” to manage your email identities and signatures.
- If you have multiple identities or email addresses configured in Roundcube, you will see a list of them here.
Step 4: Select an Identity
- Click on the identity (email address) for which you want to add or edit the email signature. If you only have one identity, it will be selected by default.
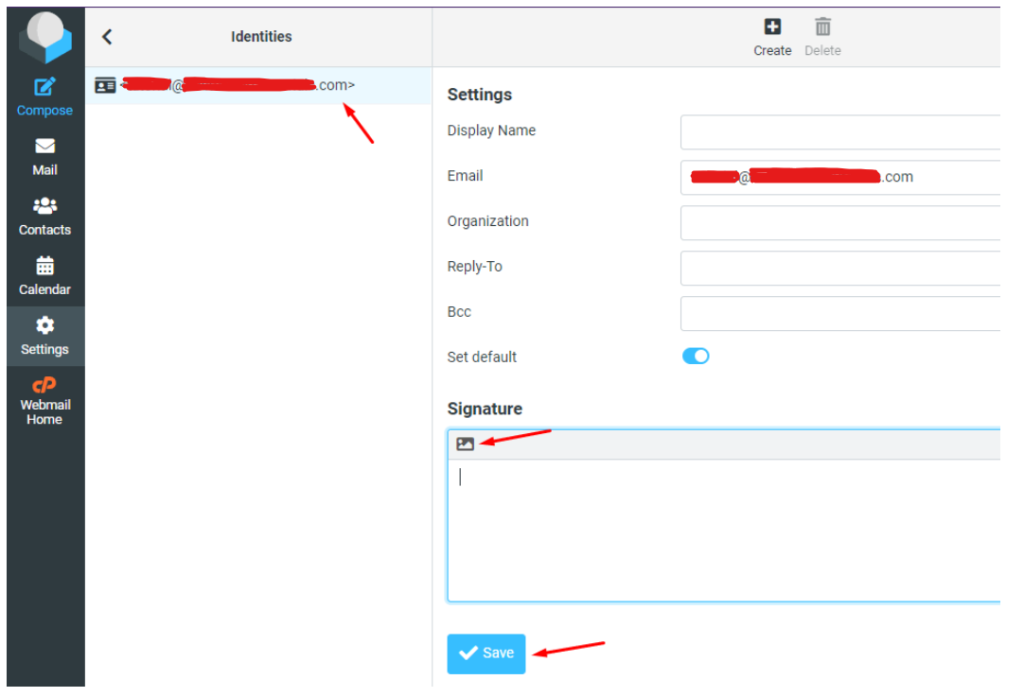
Step 5: Create Your Signature
- After selecting the identity, you will see several fields including Name, Organization, Email, Reply-To, Bcc, and Signature.
- In the “Signature” field, you can create your email signature. This field supports both plain text and HTML, allowing you to customize the appearance of your signature.
Step 6: Save the Signature
- After you have created your signature, scroll down to the bottom of the page (if necessary) and click the “Save” button to save your changes.
- Your email signature is now added to your selected identity and will be included in all outgoing emails from this identity.
Step 7: Verify the Signature
- Compose a new email to verify that your signature is appearing correctly.
- Click on the “Compose” button or “New Message” (depending on your Roundcube interface).
- Check the email composition window to see if your signature appears at the bottom of the email body.
- If it doesn’t appear, ensure that the correct identity is selected in the “From” field while composing the Email Signature.
Additional Tips for Email Signatures
- Keep It Professional: Ensure that your email signature is professional and concise. Avoid adding too much information or unnecessary images that can make your emails look cluttered.
- Include Essential Information: Include key contact details such as your full name, position, company name, phone number, and email address. Optionally, you can include your company’s website and social media links.
- Consistent Branding: Use your company’s colors, fonts, and logo to maintain consistent branding across all your communications.
- Legal Compliance: Make sure your email signature complies with legal requirements in your jurisdiction, such as including a company registration number or disclaimer if required.
By following these steps, you can easily add a professional and effective email signature to your Round cube webmail, ensuring that your emails are well-branded and informative.