Table of Contents

WHM (Web Host Manager) or cPanel, “Create a New Account” create account is a feature that allows you to set up a new hosting account on your server. This feature is typically used by web hosting providers or server administrators to create account for clients or users who want to host their websites.
When you create a new account, you specify details such as the domain name, username, password, and other settings related to disk space, bandwidth, email accounts, databases, and more. You can also assign hosting packages to the new account, which define resource limits and features available to the account.
The process of creating a new account involves configuring these details and settings through WHM or cPanel’s user-friendly interface. Once the account is created, the user can access their hosting account via cPanel to manage their website, emails, files, databases, and other aspects of their hosting environment.
Creating new accounts in WHM or cPanel allows hosting providers to efficiently manage multiple websites and users on a single server while providing them with the necessary resources and tools to manage their online presence effectively.
If you’re a VPS service provider, a Reseller host, or a own a Dedicated hosting plan, you will likely have to create a cPanel amount in WHM.
With WHM you can manage and host separate cPanel accounts independent from one another, and the cPanel users are completely unaware of the other people they are sharing the server with. This essentially gives them separate “sandboxes” to use for their own websites and email.
In this tutorial, we will walk you through creating a cPanel account in WHM.
You can also set different limitations based on the purpose of the sites or the amount you are reselling them for. For example, you may be using a cPanel to host a basic “business card” website for a client that will not need many resources. So, you can set limits on bandwidth and disk usage for this user and charge them less than a more resource-intensive site.
Creating Accounts in WHM
To create a new account in WHM (Web Host Manager), follow these steps:
- Log in to WHM:
Open your web browser and navigate to the WHM login URL. This is typically https://yourdomain.com/whm, where “yourdomain.com” is your server’s domain name.
Enter your WHM username and password to log in. These credentials are provided by your hosting provider.
2.Navigate to “Create a New Account”:
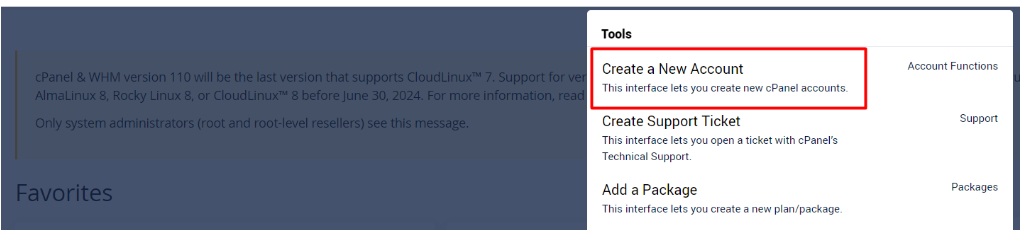
- Once logged in, you’ll land on the WHM dashboard.
- In the left-hand sidebar or navigation menu, look for an option labeled “Create a New Account.” This option is usually found under the “Account Functions” or “Account Management” section.
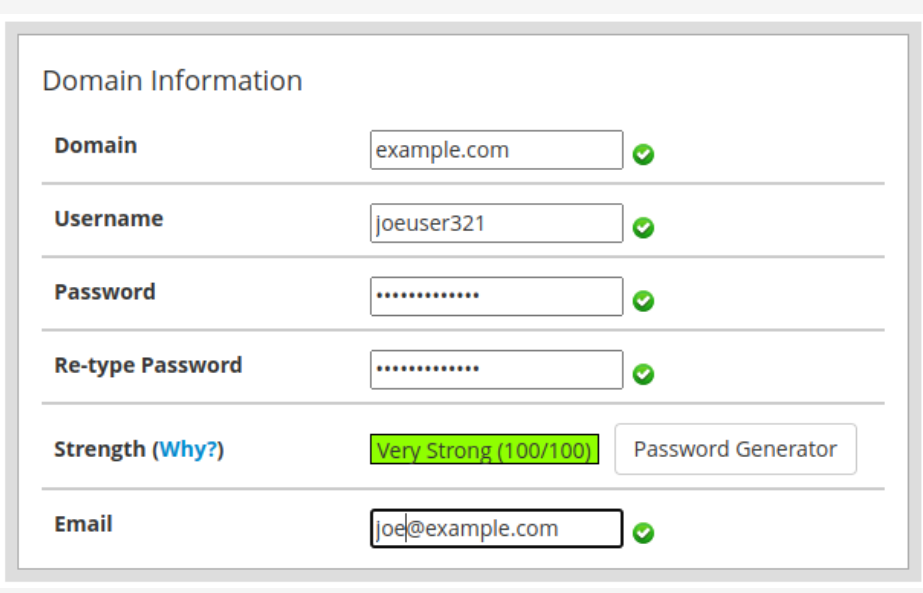
3.Fill in Account Details:
| Domain | The primary domain name for the cPanel account. |
|---|---|
| Username | Username for logging into the cPanel. |
| Password | Password for logging into the cPanel. |
| Email address to receive cPanel account notifications. |
- Click on “Create a New Account” to access the account creation form.
- Fill in the required details for the new hosting account, including:
- Domain: Enter the domain name for the new account (e.g., example.com).
- Username: Specify a username for the new account.
- Password: Set a password for the new account.
- Email: Provide an email address associated with the new account.
- Package: Select a hosting package or specify custom resource limits for the new account.
- Choose any additional settings or features as needed.
4.Configure Package (Optional):
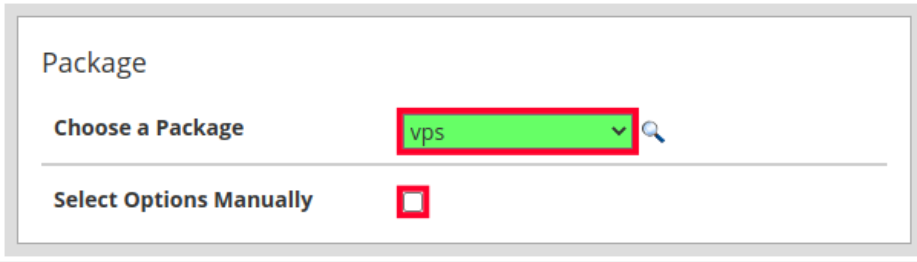
- If you have predefined hosting packages, you can select one from the dropdown menu. These packages typically include predefined resource limits such as disk space, bandwidth, email accounts, databases, etc.
- Alternatively, you can specify custom resource limits for the new account by selecting the “Select Options Manually” option.
5.Complete the Process:
| cPanel theme | Layout and design of the cPanel dashboard. |
|---|---|
| Locale | Default language for the cPanel. |
| Enable Apache SpamAssassin | SpamAssassin is an email filter that can flag suspected spam messages or send them to a spam box. |
| Enable Spam Box | If you enabled SpamAssassin it will automatically add a spam flag to the subject line of messages and deliver them to your inbox. But when you enable the spam box they will be sent to a separate spam folder instead. |
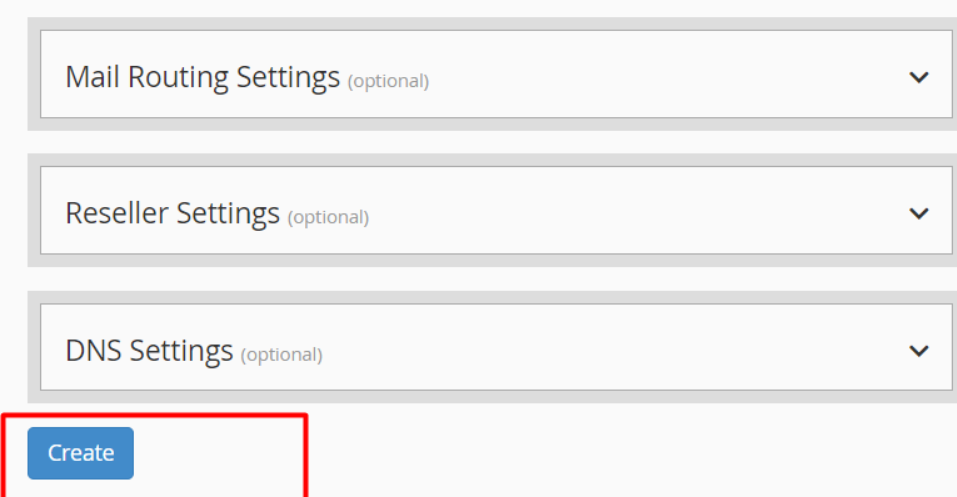
- Review the account details to ensure everything is correct.
- Click on the “Create” or “Create Account” button to finalize the account creation process.
6.Confirmation:
- After creating the new account, you’ll receive a confirmation message indicating that the account has been successfully created.
- You’ll also see the new account listed in the account list within WHM.
8.Additional Configuration (Optional):
- Depending on your requirements, you may need to configure additional settings for the new account, such as DNS settings, SSL certificates, email configurations, etc.
| Enable DKIM on this account | DKIM (DomainKeys Identified Mail) helps verify that an email was not modified and came from a valid sender. |
|---|---|
| Enable SPF on this account | SPF (Sender Policy Framework) records are used to identify the servers that are allowed to send mail for your domain. A recipient server can then check the SPF record when an email is received and confirm it was sent from a valid server. |
| Use the nameservers specified at the Domain’s Registrar | This will disregard any nameserver settings you may have in your cPanel and follow the registrar instead. |
| Overwrite any existing DNS zones for the account | Enable this to remove and replace any existing DNS zones with this latest record. |
That’s it! You’ve successfully created a new hosting account in WHM. The new account is now ready to be used, and you can start uploading files, creating email accounts, installing applications, and managing the website associated with the domain you specified during the account creation process.